Last Updated: October 26, 2026
Quick Summary
Selective laser sintering is a powder-bed additive manufacturing process that uses a high-power laser to fuse polymer powder particles layer by layer, building three-dimensional parts from the ground up. Unfused powder serves as natural support, eliminating external scaffolding and enabling complex internal geometries.
- The powder bed is preheated to 180-200°C, just below the polymer's melting point, before sintering begins.
- Each layer is typically 0.1-0.15 mm thick, created by the laser tracing the part's cross-section.
- Parts cool gradually within the heated chamber over several hours after the final layer is sintered.
- Typical tolerances are ±0.3-0.5 mm, with tighter tolerances requiring post-machining.
- Polyamide is the most common material, though PEEK, PEI, and PPSU are available for demanding applications.
Table of Contents
- What Is Selective Laser Sintering
- The Five-Step SLS Process
- SLS 3D Printing Materials and Their Properties
- SLS vs. SLA: Choosing the Right Powder-Bed Technology
- Selective Laser Sintering Advantages and Disadvantages
- SLS 3D Printing Applications Across Industries
- Design Rules, Tolerances, and Quality Control
- Getting Your SLS Project Started with Black Creek Works
- Frequently Asked Questions
What Is Selective Laser Sintering
Selective laser sintering is a powder-bed additive manufacturing process that uses a high-power laser to fuse polymer powder particles layer by layer, building three-dimensional parts from the ground up. Unlike traditional subtractive manufacturing that removes material, selective laser sintering adds material in precise increments, enabling production of complex geometries that would be impossible or prohibitively expensive to machine.
The process works by selectively fusing powder particles at specific cross-sections defined by your 3D model. The laser beam moves across a heated powder bed, melting particles where the design calls for solid material. Unfused powder remains in place, serving as natural support, eliminating the need for external scaffolding that other methods require. This self-supporting capability makes selective laser sintering particularly valuable for intricate internal features, undercuts, and hollow sections.
The Five-Step SLS Process
Selective laser sintering follows a consistent workflow that transforms your digital design into a physical part. Understanding each step helps you anticipate lead times, plan for material properties, and optimize your design for the process.
Step 1: Powder Preparation and Preheating
Before sintering begins, the powder bed must reach the correct temperature. The build platform and surrounding chamber are heated to just below the polymer's melting point, typically 180-200°C for polyamide. This preheating is critical because it reduces the thermal energy the laser must supply to fuse particles, improving speed and consistency while minimizing thermal stress on the part.
Fresh polymer powder is loaded into the machine's hopper and carefully distributed across the build platform. The powder must be uniform in particle size and free of contaminants, as inconsistencies can create weak points or surface defects. Many operations blend recycled powder from previous builds with virgin material to reduce waste, though the ratio depends on the polymer type and performance requirements.
Step 2: Laser Sintering Each Layer
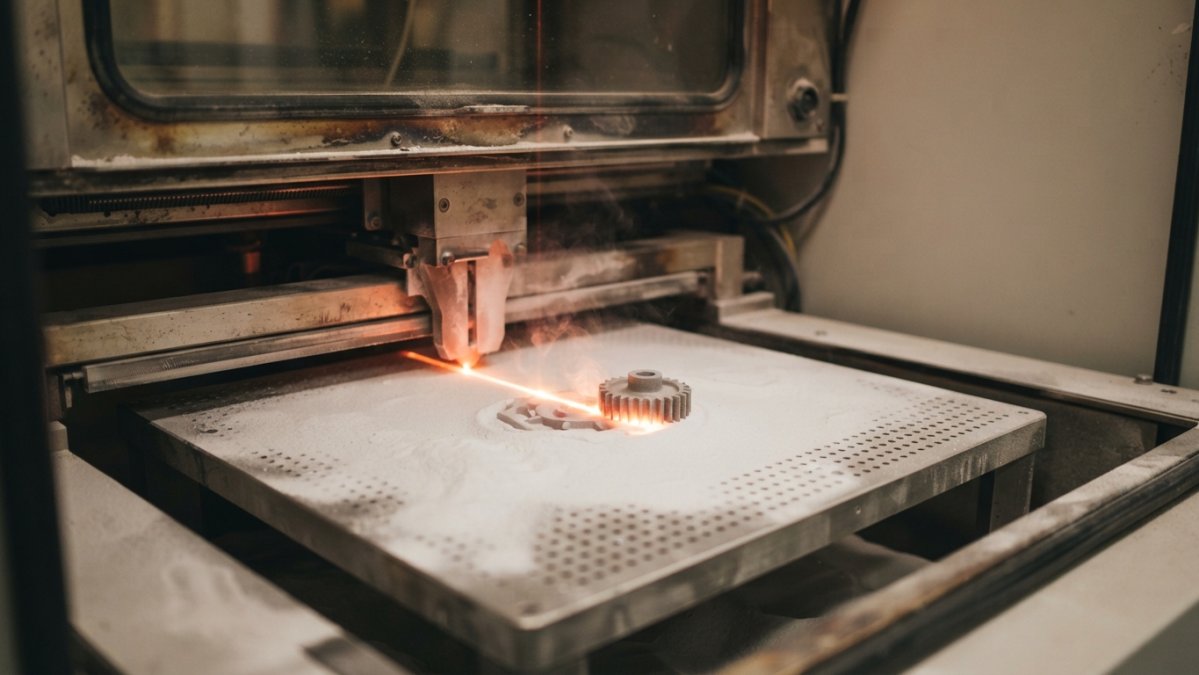
Once the powder bed reaches operating temperature, the laser begins its work. A high-power CO2 or fiber laser traces the cross-section of your part at the current layer height, moving across the powder bed in a controlled pattern. Wherever the laser passes, thermal energy causes polymer particles to melt and fuse together, forming a solid layer typically 0.1-0.15 mm thick.
The laser's power, speed, and beam diameter are calibrated to achieve complete fusion without overheating the surrounding powder. Too little energy leaves weak bonds; too much energy can distort the part or create surface roughness. The precision of this balance directly affects part strength and dimensional accuracy.
Step 3: Platform Descent and Powder Recoating
After one layer is sintered, the build platform lowers by one layer thickness, usually 0.1 mm. A recoating mechanism then spreads a fresh layer of powder across the entire bed, covering the newly sintered layer and preparing the surface for the next pass. This cycle repeats hundreds or thousands of times, depending on your part's height and the layer thickness you've selected.
The recoating process must be smooth and consistent. Any gaps or uneven powder distribution can create voids in subsequent layers, compromising part integrity. Modern SLS machines use roller or blade systems designed to move powder gently without compacting it excessively.
Step 4: Cooling and Part Consolidation
As each layer is added, the part begins to cool slightly, but the surrounding powder bed remains hot. This controlled cooling environment is one of selective laser sintering's key advantages, it minimizes thermal shock and warping that plague other 3D printing methods. Parts cool gradually within the machine chamber over several hours after the final layer is sintered.
During cooling, the fused layers bond more completely, and internal stresses relax. The preheated powder surrounding the part acts as a thermal buffer, ensuring even cooling and maintaining material properties. This is why parts built with selective laser sintering typically show better mechanical properties and dimensional stability than parts from processes that cool rapidly in open air.
Step 5: Powder Removal and Post-Processing
Once the part has cooled sufficiently, the build platform is removed from the machine and brought to a powder recovery station. Loose, unfused powder is carefully removed, this material can be recycled for future builds, reducing material waste. The recovered powder is sifted, inspected for contamination, and blended with virgin material according to your specifications.
The finished part may require post-processing depending on your application. Common finishing steps include media blasting to smooth the surface, infiltration with sealants for improved surface finish or water resistance, dyeing for color, or machining for critical features that demand tighter tolerances than the sintering process alone can deliver.
Selective laser sintering transforms digital designs into physical parts through five consistent stages.
| Step | Action | Key Detail |
|---|---|---|
| 1 | Powder preparation and preheating | Heat bed to 180-200°C, just below melting point |
| 2 | Laser sintering each layer | Trace cross-section, create 0.1-0.15 mm layer |
| 3 | Platform descent and recoating | Lower platform 0.1 mm, spread fresh powder |
| 4 | Cooling and consolidation | Cool gradually in heated chamber over hours |
| 5 | Powder removal and post-processing | Recover unfused powder, finish part as needed |
SLS 3D Printing Materials and Their Properties
Material selection fundamentally shapes what your part can do. Selective laser sintering works with several polymer families, each offering different balances of strength, flexibility, temperature resistance, and cost.
Polyamide (nylon) is the most common choice. It offers excellent strength-to-weight ratio, good chemical resistance, and reasonable cost.
PEEK (polyetheretherketone) and PEI (polyetherimide) are engineering-grade thermoplastics reserved for demanding applications. These materials withstand higher temperatures, resist more aggressive chemicals, and maintain strength at elevated service temperatures.
PPSU (polyphenylsulfone) sits between polyamide and PEEK in performance and cost. It offers superior temperature resistance compared to nylon while remaining more affordable than PEEK, making it a practical choice for applications requiring moderate thermal performance.
Metal-filled polymers blend metal particles into the polymer matrix, offering improved thermal conductivity and stiffness. These materials are emerging for applications where thermal management or structural rigidity matters more than traditional polymers can deliver.
SLS vs. SLA: Choosing the Right Powder-Bed Technology
Selective laser sintering and stereolithography (SLA) are both powder-based or resin-based additive processes, but they serve different needs. Understanding the distinction helps you choose the right method for your project.
SLA uses a UV laser to cure liquid resin layer by layer, building parts from the bottom up in a resin bath. It excels at producing smooth surfaces and fine details with minimal post-processing. Parts emerge from the machine nearly finished, making SLA ideal for visual prototypes, jewelry, and applications where surface aesthetics matter most.
Selective laser sintering fuses solid powder particles, creating parts with superior mechanical properties and material stability. SLS parts are durable, temperature-resistant, and suitable for functional testing and low-volume production. The trade-off is rougher surface finish and more extensive post-processing.
Choose selective laser sintering for functional prototypes, end-use parts, and designs with internal features. Choose SLA for visual prototypes, small intricate details, and applications where surface finish is critical.
Selective Laser Sintering Advantages and Disadvantages
Advantages of selective laser sintering are substantial. The process requires no external support structures because unfused powder acts as built-in support, enabling complex geometries with internal cavities, thin walls, and undercuts. Material properties are excellent, parts are strong, durable, and stable, suitable for both prototyping and production use. The powder bed environment allows for excellent dimensional accuracy and minimal thermal warping. Design freedom is exceptional; you can iterate rapidly without tooling costs, and batch sizes from one to thousands are economically viable.
Disadvantages require honest acknowledgment. Surface finish is rough compared to other methods, parts typically require post-processing like media blasting or coating to achieve smooth surfaces. The process is slower than some alternatives; build times depend on part geometry, layer thickness, and material, but hours to days are typical. Equipment cost is high, and operating expenses include powder, machine maintenance, and energy. Material costs are moderate to high depending on polymer choice. Part accuracy, while good, has practical limits, typical tolerances are ±0.3-0.5 mm, tighter tolerances require post-machining.
SLS 3D Printing Applications Across Industries
Selective laser sintering has moved beyond prototyping into production environments across multiple sectors. Automotive manufacturers use SLS to produce intake manifolds, air ducts, and custom brackets, reducing weight and lead time compared to traditional casting or machining. Aerospace relies on SLS for brackets, clips, and thermal management components where design complexity and weight savings justify the process.
Consumer goods companies use selective laser sintering for custom components, limited-edition products, and rapid market testing. Industrial equipment manufacturers produce replacement parts on demand, eliminating inventory costs. Robotics and automation benefit from SLS's ability to create complex geometries for fixtures, grippers, and custom mechanical components. Research into additive manufacturing adoption across industries shows that companies using selective laser sintering report faster time-to-market and reduced development costs compared to traditional manufacturing.
For businesses seeking on-demand 3D printing solutions, selective laser sintering offers the combination of speed, material strength, and design freedom that makes it ideal for custom components and functional prototypes.
Design Rules, Tolerances, and Quality Control
Success with selective laser sintering depends on understanding its design constraints. Wall thickness should typically be at least 1.5-2 mm to ensure adequate strength and printability. Thinner walls risk fracturing during powder removal or in service.
Tolerances achievable with selective laser sintering are typically ±0.3-0.5 mm for general dimensions. Tighter tolerances (±0.1-0.2 mm) are possible but require post-processing like CNC finishing. Dimensional accuracy is best in the XY plane (laser beam direction); Z-axis (layer-by-layer) accuracy depends on layer thickness and material properties. Plan your design with these limits in mind, and specify tolerances only where functionally necessary.
Quality control begins with design review, checking for thin walls, small features, and trapped powder before manufacturing. During production, process parameters are monitored continuously. After sintering, parts are inspected for dimensional accuracy, surface defects, and structural integrity. Common issues include warping (usually from inadequate cooling time), porosity (from insufficient laser power), and surface roughness (inherent to the process).
Getting Your SLS Project Started with Black Creek Works
Beginning an SLS project requires clear communication about your design, material needs, and timeline. Start by understanding the cost factors behind 3D printing projects so you can budget accurately and avoid surprises.
Explore our full range of manufacturing capabilities and see how we can transform your ideas into production-ready parts.
Frequently Asked Questions
What is selective laser sintering, and how does it differ from other 3D printing methods?
Selective laser sintering uses a high-power laser to fuse polymer powder particles together layer by layer. Unlike FDM, which extrudes melted plastic through a nozzle, SLS sinters powder without support structures because the surrounding powder holds the part in place. This makes SLS ideal for complex geometries and functional prototypes that need strength and precision.
What materials are commonly used in SLS 3D printing?
Polyamide (nylon) is the most common SLS material due to its strength, flexibility, and durability. Engineering-grade thermoplastics like PEEK, PEI, and PPSU are used for high-performance applications requiring heat resistance. Some SLS systems also support metal-composite powders. Material choice depends on your part's mechanical requirements, operating environment, and cost constraints.
What are the main advantages and disadvantages of selective laser sintering?
Advantages include design freedom with complex geometries, no support structures needed, excellent mechanical properties, and the ability to produce functional end-use parts. Disadvantages include higher equipment and material costs, longer lead times than some processes, and surface roughness requiring post-processing. SLS also generates powder waste, though reused powder can lower costs.
What are the best applications for SLS 3D printing?
SLS excels for functional prototypes, custom mechanical parts, aerospace components, automotive fixtures, and production-volume custom items. It's ideal when you need complex internal geometry, tight tolerances, or durable parts that withstand repeated use. Industries from medical device manufacturing to consumer product design rely on SLS for both prototyping and low-to-medium production runs.